Showing posts with label diy. Show all posts

Tuesday, June 12, 2012

Father's Day Photo Letter Gift

I made this for my dad for Father's Day.  The grandkids call him Pop. 


Since I have one kid, I went went the O and since my sister has two she went with the P so she only had to purchase one letter.  I think the letters were $3.99 at Michaels.  We each took our photos and then she sent me hers.

I created a Microsoft Powerpoint slide.  Then I added and sized the photos and added the Happy Father's Day.  I sent it to Walgreens to be printed as an 8x10.  Then I purchased an 11x14 frame with matting and framed it.  Easy... personal... and I think he will love it.


I wrapped it up with tons of bubble wrap, boxed it up with tons of packing paper, and it will be off tomorrow morning to my dad in Virginia.

If you are interested in the file (with blank spots where my photos are) I used to create your own... leave a comment with your email or make sure you email is tied to your comments and I will respond back via email with the attachment.  This of course would also work with DAD.

Saturday, February 18, 2012

Frames + Scrapbook Paper = DIY Wall Art


How I Did It-

I have only been able to find once piece of art for our living room that both my husband and I liked and that went with our living room (it is the numbers canvas in the above photo). So, I decided to make my own wall art.
I have been on the hunt for months for scrapbook paper that matched the fabrics in our living room.  It wasn't until last week when I finally settled on two pieces I loved.  I wanted the square look, but really this project can be done with any mat opening 12x12 or smaller. 

I simply purchased the materials and then framed the scrapbook paper as I would a photo.

I love how these turned out.

Purchasing the Supplies -

My frames are 20x20 with 11.5x11.5 openings and are from Ikea for $19.99.  Mine are black but they are also available in white or natural wood.  They can also be purchased online from Ikea here.

This paper I used was purchased at either Michaels or AC Moore (I do not remember) and can be found online here for less than 50 cents per 12x12 sheet.


The other paper was purchased at AC Moore within the last week or so.  I couldn't find it online. 

Total Cost = $41.48

2 sheets of scrapbook paper $1.50
2 square Ikea frames $39.98

What I Love About It -

  • It matches the other colors in our room.
  • It looks fabulous hanging on our green wall.
  • I can always change out the paper if I change the colors in my living room.

Monday, January 9, 2012

DIY LOVE - Making Your Own Rug From Fabric = Super Easy

My in real life friend (back when I had those...when we lived in Virginia) made this RUG and posted it on her BLOG.  Kara is way super crafty... way more so than me and I love/need/want a new rug like this.  I am hoping she will read this post, the email I sent her, and the comment I just left on her blog... and make me one... and mail it to Rhode Island. 


All you need is some fabric and a few supplies from Home Depot or Lowes and you can make one too!!  Isn't is amazing??

I am thinking something fun and colorful and bright... and chevron like this would be perfect -


Wednesday, November 30, 2011

Invitation Christmas Ornaments - DIY Tutorial

Earlier in the week I discussed how I had a goal to make at least 3 things from my Pinterest boards...and well tonight I made my first thing.


This was so easy to make.  I made this one for a cousin who is getting married this weekend.  As soon as I find my stash of leftover wedding invitations... I will be making one for ME!!

These are selling on Etsy for $10-$20.  Craziness!!

I suggest making your own.

I bought a 4 pack of clear glass ornaments from Michaels.  They were regularly $4.99 are are 50% off through Saturday.

I took the wedding invitation and used my paper cutter (you could use scissors) and cut it into thin strips making sure to leave all relevant information (names, dates, etc..) in tact.


Next I used a pen to curl the strips.


Then I opened the top of the ornament and stuffed in the paper pieces.


You could also make them using shower invitations.  So if you have a leftover invitation, this would be an easy ornament for you to make for your tree this year.

Thursday, October 20, 2011

My Finished Pine Country Server - The Final Paint Job

I bought this off of Craigslist a few weeks ago for $100.  It was solid pine and I knew I wanted to paint it.


My color inspiration came from my new living room pillows which were made from these fabrics I purchased at Hobby Lobby -


Photos of the process -


The finished product -


The finished product {I sat a pillow on top so you could see how the colors coordinate}.


Here it is all decorated.  I just love it.  Right when you walk in the front door this is on the left.   I think I am going to put some baskets on the bottom.  To the right is our living room.


Friday, September 23, 2011

Fabulous Fridays

This is going to be quick.  We ordered Bridesmaids on pay per view and it starts in 11 minutes.

This morning I got up and did my usual morning routine - making a hot breakfast and packing lunches for Chris and Maddie.

After she went to school I got sucked into the original 16 & Pregnant on MTV while folding laundry.  This morning was Macy & Ryan.  I didn't really want to get ready to go volunteer at Madison's school... but I went anyways.

I got there and her teacher looked at me like I was nuts.  I swear I was supposed to be there today from 9-12, but she didn't need me until 11:30.  So I left.

I ended up at Target.

Since I had skipped breakfast I went to the Starbucks inside for a cup of heaven or otherwise known as a salted caramel hot chocolate.


While in the dollar section looking at the Halloween stuff a lady  starts randomly talking to me.  I hate when people do this.  She went on and on how her complex makes you only have a sign on your door to say you want trick or treaters and she just isn't doing this.  She goes on and on about how she is decorating.  I nodded and muttered a few "umm hmms" and then went to the next row of dollar stuff... and then I heard her start up with someone else.  I wanted to say "Listen lady... I get it... I have no friends either... I am all alone at Target too... but unlike you I am not friend searching at Target".  I may sound like a total B*TCH... but I wasn't in the mood for Halloween decorate conversations with strangers.

I did pick these up which I read about on some blog.  YUMM-O.  I said they were for Maddie when I threw them in my cart... but I really wanted them too.


I ended up with about $95 of randomness... some sodas, some jeans for Maddie, three bags of Halloween candy, some pumpkin pie yogurt I cannot wait to try, paper plates, organic vanilla milk, etc....

Gosh... I love Target.

We went to dinner tonight.  We haven't been out to dinner at a restaurant (Subway doesn't count) in two weeks.  I think we definitely enjoyed it more than usual.  Madison told me this week she missed going to restaurants.  It was nice to relax and have someone else serve me and clean up the dishes.

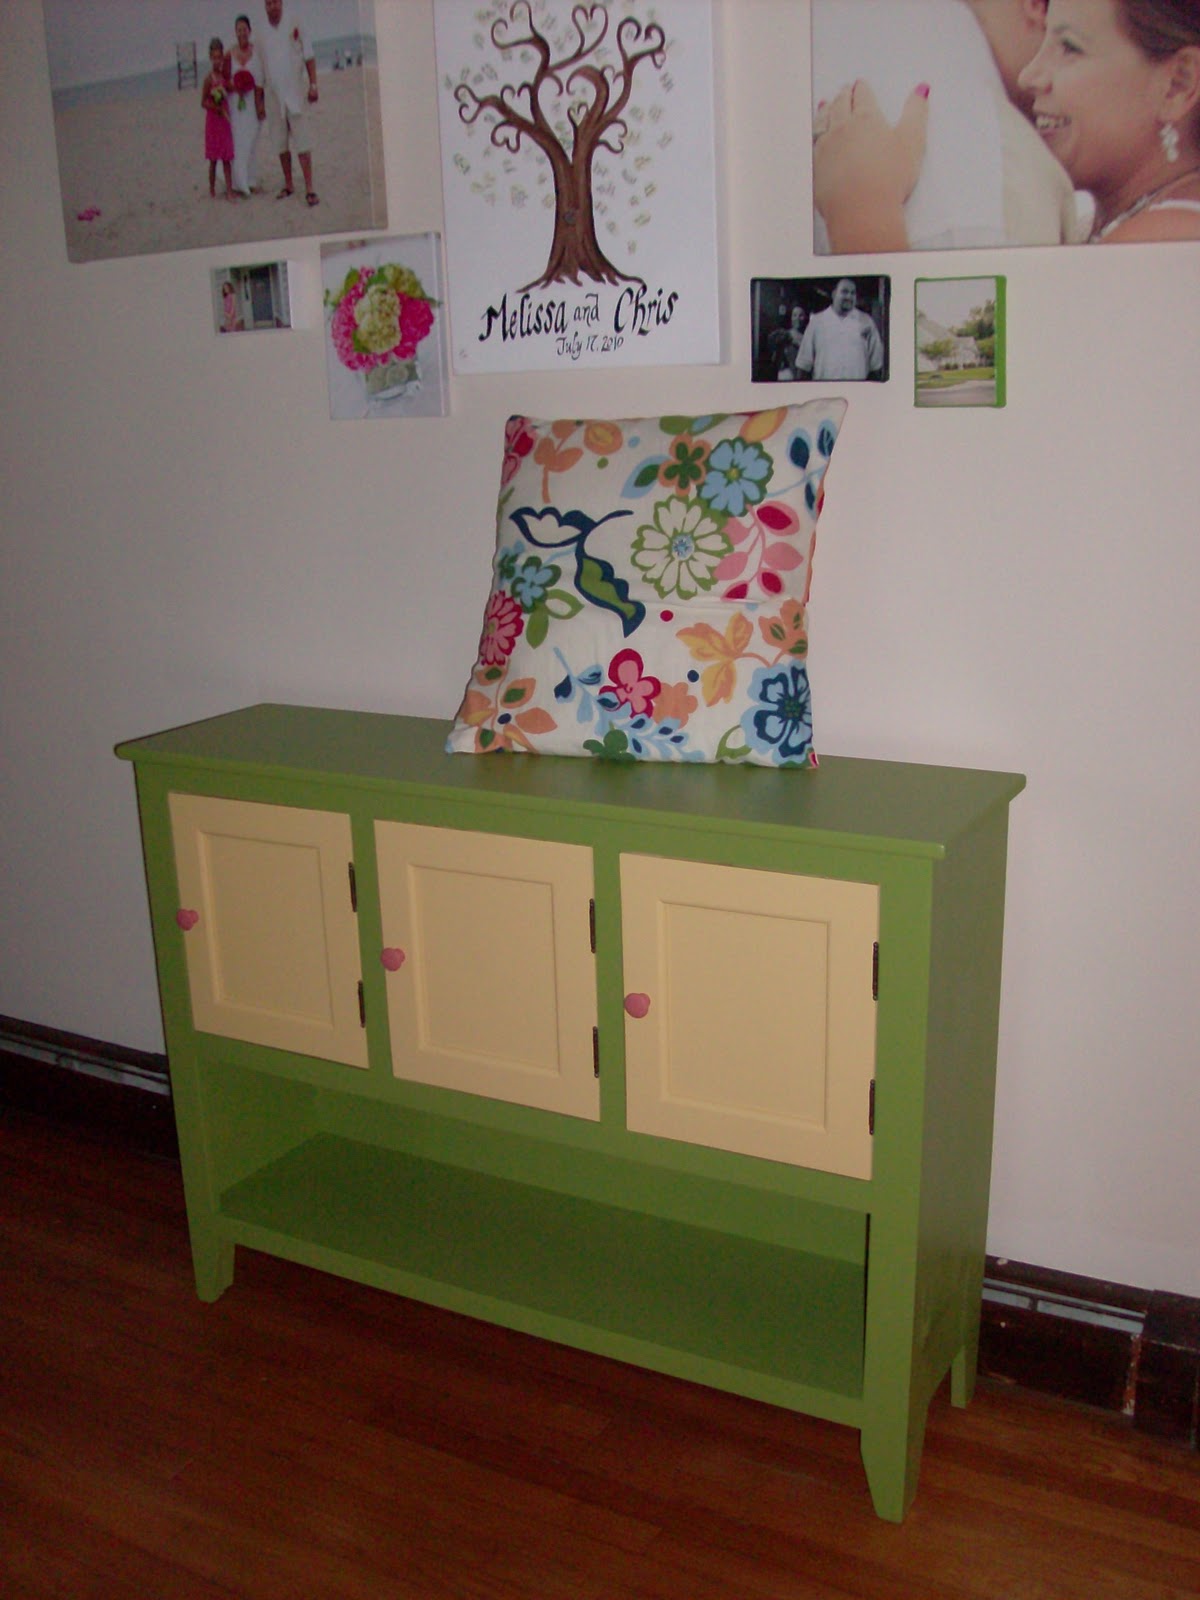
Now we are about to watch a movie.  Next week I can't wait to share more about this neat DIY project I did for Madison's room.  Here is a sneak peek -


Happy Weekend!!

Thursday, August 18, 2011

Decorating Ideas via Pinterest

I have a wall in my kitchen just about this side that I am seriously considering doing this on.  What do you think?


I have the board and the star fish to make this for my bathroom... I just need to do it.


I started to make this before the move.  I have the canvas painted with the branches.  I just need to add the flowers.


I am definitely doing a plate wall. I have a small wall space to the right of our sliding glass doors in the dining room.  It's going there.  I have picked up I think 8 plates or so already.  I need to buy the hangers.


I am not sure what quote I am going to use, but I definitely think this project is in my near future.


DIY - Bathroom Decor

I decided to do a beachy/ocean/nautical themed bathroom in our new house.  Our new bathroom has a lot of wall space.  I set out to create a 3 piece set of art for the bathroom.  I am so happy with how they turned out.

 I used Picnik to create my prints.  I saved them as JPEG files.  Then I uploaded them to CVS and ordered 5x7 prints (which were less than $1).  I got the frames for $1.99 each at this great little shop near our new house called Christmas Tree Shops. I love this store... I have picked up lots of fun items here...and it isn't what it sounds like... I only saw 1 aisle of Christmas stuff.

I traced around the frames on leftover packing paper, cut them out, and taped them up on the wall to make sure I had them spaced out how I wanted them.  Then I put the nail in the wall with the paper up and then removed the paper.  I will definitely be using this technique (which I saw on Pinterest) to hang the rest of our frames.


The set of these three prints are available for digital download in my etsy shop... if you are interested.  Use code "BLOG1" to save 15% off your first purchase.


Then you can print them out at your local drug store, Target, Costco, etc... and frame them. 

Contact me through etsy if you are interested in different colors or different sea creatures... I can do custom prints for you.

Sunday, July 10, 2011

Our Wedding Recap # 1 - The Little Details

Our 1 year wedding anniversary is July 17, 2011.

We were engaged July 18, 2009 {after only dating since February of that year...so about 5 months}, had a year long engagement,  and were married July 17, 2010.

I have always wanted to share a bunch of our wedding details and photos on my blog, I just have never gotten around to doing it.  With our 1 year anniversary approaching... I thought now was as good of a time as ever.

Our colors were lime green and hot pink.  We had a casual beach {although it was raining and moved inside} wedding.  I planned and designed the majority of the aspects of the wedding to not only keep it budget friendly but to make sure it was totally us.


{Here is a collage our photographer did of all of the little details from our wedding. We had Chinese takeout boxes for the candy bar, personalized water bottles, flip flop cupcakes, and beach pail favors for the kids}

{I designed and my husband and his best man built our cupcake stand.  My friend, Kara, did the ribbon around it for me}

{Our candy bar}

{The centerpieces}

{The personalized water bottles.  My mom's friend's intern designed the labels}

{The 6th grade dean at my school painted this for us.  Guests used their fingerprints to make leaves on the tree and then signed their names}

{My bouquet}

{Our rings over Hershey's Kisses}

{Our cake table}

I loved how well the pink and green came together.  The candy bar was a big hit among our guests.   Creating this post has brought back so many fond memories of our wedding day.

Our wedding recap # 2...coming tomorrow...

{All photos are via Amy Sandoval Photography}